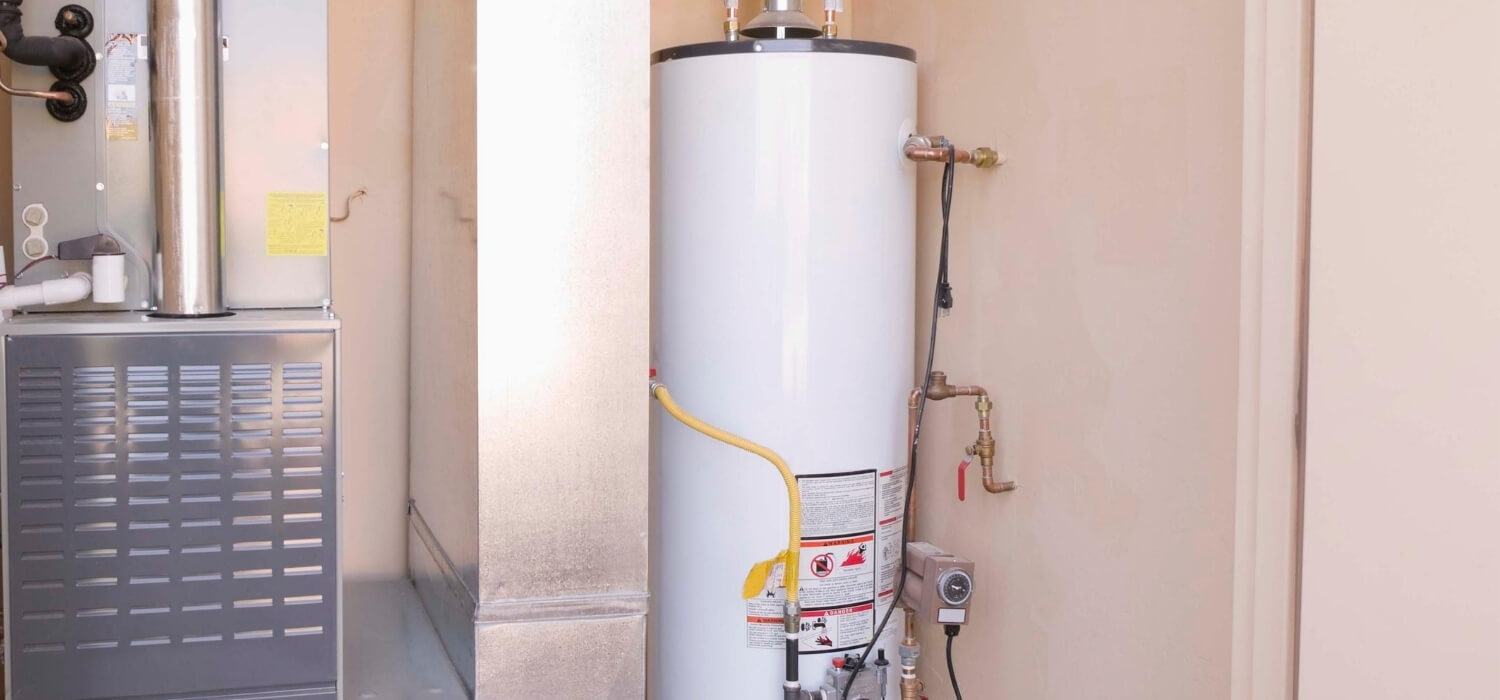
How to Clean an Electric Water Heater

Enjoy reading the latest DIY articles and saving money?
Receive our latest helpful hints, tricks and savings, directly to your inbox.
Posted July 24, 2020
Did you know that on average, water heaters can last you for up to a decade? Electric heaters last even longer, with some having a useful service life of up to 15 years. However, these only apply to properly-installed systems that receive regular maintenance. Those that don’t meet these criteria are prone to early breakdowns and failure. Units that process water with a lot of dissolved minerals also tend to fail early. This is why it’s best that you learn how to clean an electric water heater. Cleaning it regularly will help extend your water heater’s lifespan. More than that, you’ll be able to cut back on your water heating bills.
We’ll explain everything in more detail below, so be sure to keep reading!
Safety First: Turn Off Your Water Heater
Before cleaning your electric water heater, make sure that you cut its power supply first. This is for your own safety, especially since at least 30,000 non-fatal shock incidents occur in the US each year. You should also don a pair of rubber insulating gloves to up your protection from arcs and shocks.
To power off your heater, check the tank itself for a power button. Depending on the brand of heater you have, this may be the “OFF” setting on the thermostat.
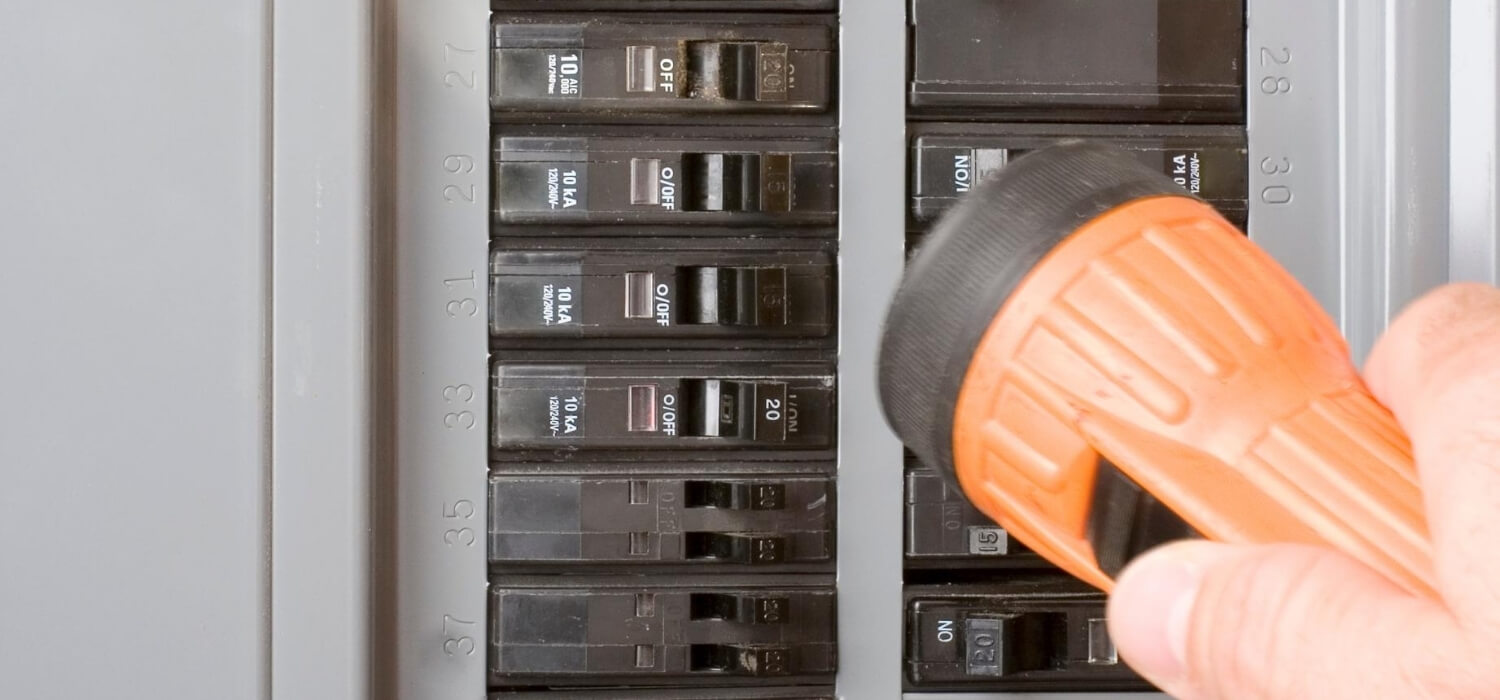
Next, head over to your home’s main circuit breaker box. Look for the specific switch that serves your electric water heater. In the US, it’s a legal building requirement for electric water heaters to have their own circuit.
There should be a clear label inside the panel indicating that a switch is for the water heater. Slide or flip the switch to the “OFF” position. This should shut the supply of power to your water heater.
You’re now ready to clean the electric water heater.
1. Clean the Exterior Side of the Hot Water Tank
If you have a vacuum cleaner, use this to remove thick layers of dust and grime on the outside of the water heater tank. A crevice attachment will help you clean the bottom of the tank. Make sure you also vacuum the area behind the heater, as well as the spots around the pipes.
Next, use a clean, dry cloth to wipe down your heater. This will help remove as much dry filth as possible.
Then, wipe down the exterior surfaces of your water heater with a damp rag. You can use a gentle household spray cleaner to get rid of more stubborn spots.
Complete this part of your electric water heater maintenance by wiping down the tank dry.
By the way, this is also a good time to check your tank for leaks. You may think that your high water bills are normal, but they may actually be due to tank leaks. In fact, the average US household has water leaks that waste about 10,000 gallons of water each year.
It’ll be easier to detect damages like holes and cracks once your tank and its pipes are clean. After wiping down the tank and pipes dry, wait for a few minutes and then check them for any signs of moisture.
If there’s none, great. If there is, then it’s best to contact a plumber to schedule your electric water heater for repairs. Depending on the severity of the leaks, a plumbing expert may still be able to salvage your tank.
2. Drain the Tank
One of the key steps to proper water heater maintenance is to flush out sediment build-up in the tank. This is why you should drain your water heater at least twice a year. Flushing it will help remove sediments that can form limescale inside your tank.
To start, switch off the cold-water valve which you’ll find at the very top of the tank. Then, look for the drain valve, which kind of looks like a faucet, near the bottom of the tank. Place a bucket right below this, so that you can minimize spills as you drain the tank.
Next, connect one end of a garden hose to the valve. Place the other end of the hose by a sink, a floor drain, or if it’s long enough, directly outside. Open the valve to discharge the tank’s contents.
To help speed things up, run one of your hot-water faucets. This will introduce air into your tank, which will then push the water out of the drain valve.
3. Refill the Tank
Don’t skip this step, especially if you live in one of the nine in ten US homes that get hard water. Hard water contains a lot of dissolved minerals responsible for the above-mentioned limescale. Hard water is also a likely culprit behind your low water pressure problems.
In any case, refill the tank with cold water a few times during the tank draining process. This will help remove more of the loose sediments.
4. Brush the Insides of Your Tank
If you have more time, you can also brush the interior lining of your tank to remove more sediments. You’d need a special kind of brush to do this though, such as the one used to clean refrigerator coils. Your local hardware store folks should be able to provide you this.
You’d also need to remove the drain valve itself, as this is where you’ll insert the narrow brush. Gently brush, scrape, and push the hardened minerals at the bottom and the lower sides of the tank.
If you haven’t done this ever, it may take a while to remove as much of the sediments as you can. Take your time though, as the more of these minerals you can get rid of, the more efficient your heater will become.
5. Flush It One Last Time
If you think you’ve removed enough sediments, flush the tank again. Leave the hole as is — don’t attach the valve or the garden hose anymore, as their opening may be too small. Do make sure to have an empty bucket under the hole though, to catch the flushed water.
The water should carry the broken pieces of hardened minerals out of the tank. Depending on how much debris you’ve managed to remove, you may need to empty your bucket several times.
Once the water that runs out of the tank looks clean and clear, you’re done! You just need to put the drain valve parts back in their proper place.
Set Your Electric Water Heater Thermostat to 120 Degrees
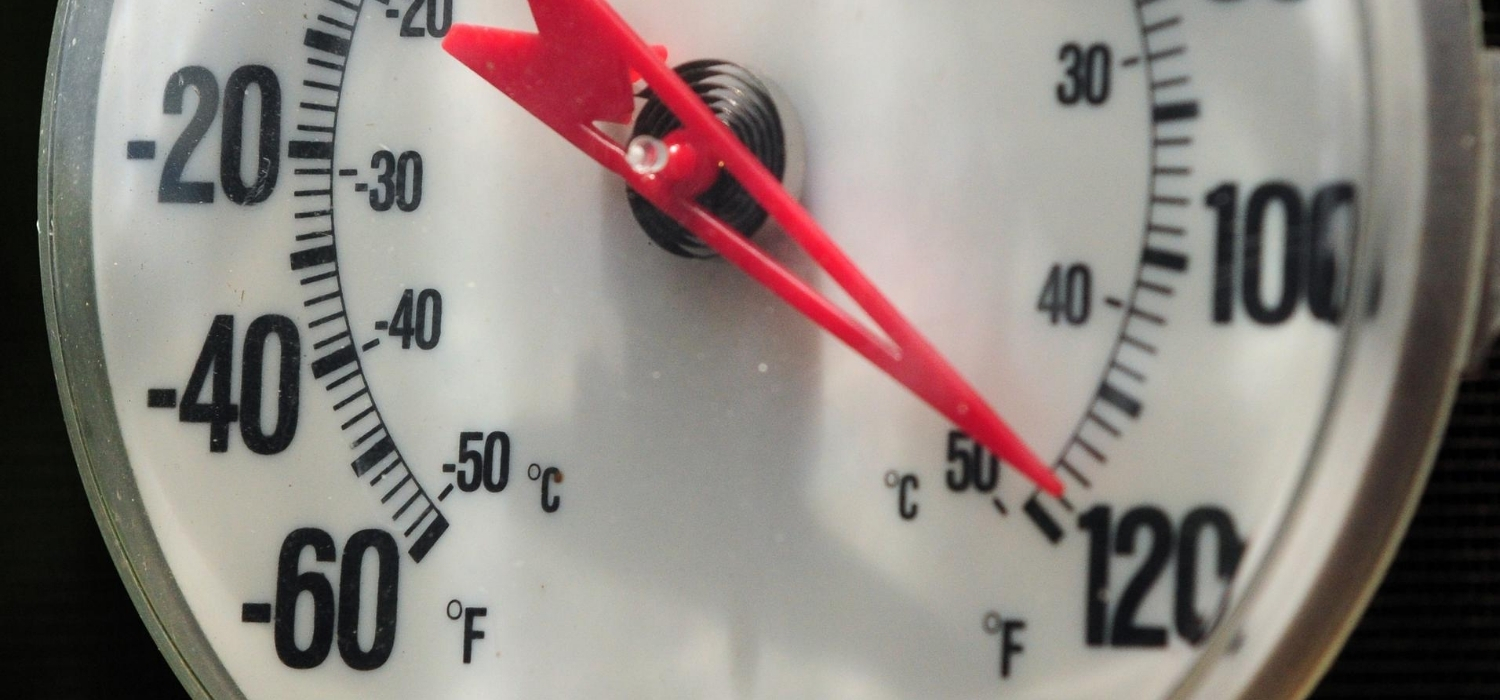
If you switched off the thermostat at the very beginning, set it back to 120 degrees. If you didn’t touch the thermostat prior to cleaning it, check if it’s set to 140 degrees. This is the default setting of most electric water heaters.
One of the main reasons you want to set it lower is to reduce your heater’s energy consumption. For every 10-degree reduction in its setting, you can save at least 3% to 5% on your water heating bills. So, with a 20-degree reduction, you can save even more!
Do note that this comes with a “very slight risk” of encouraging legionellae bacteria. However, as the experts at the Department of Energy say, 120 degrees is still safe for most people. Unless you or a family member has immune system concerns, then you can set your thermostat to 140 degrees.
Keep Your Water Heater’s Pressure Relief Valve in Good Condition
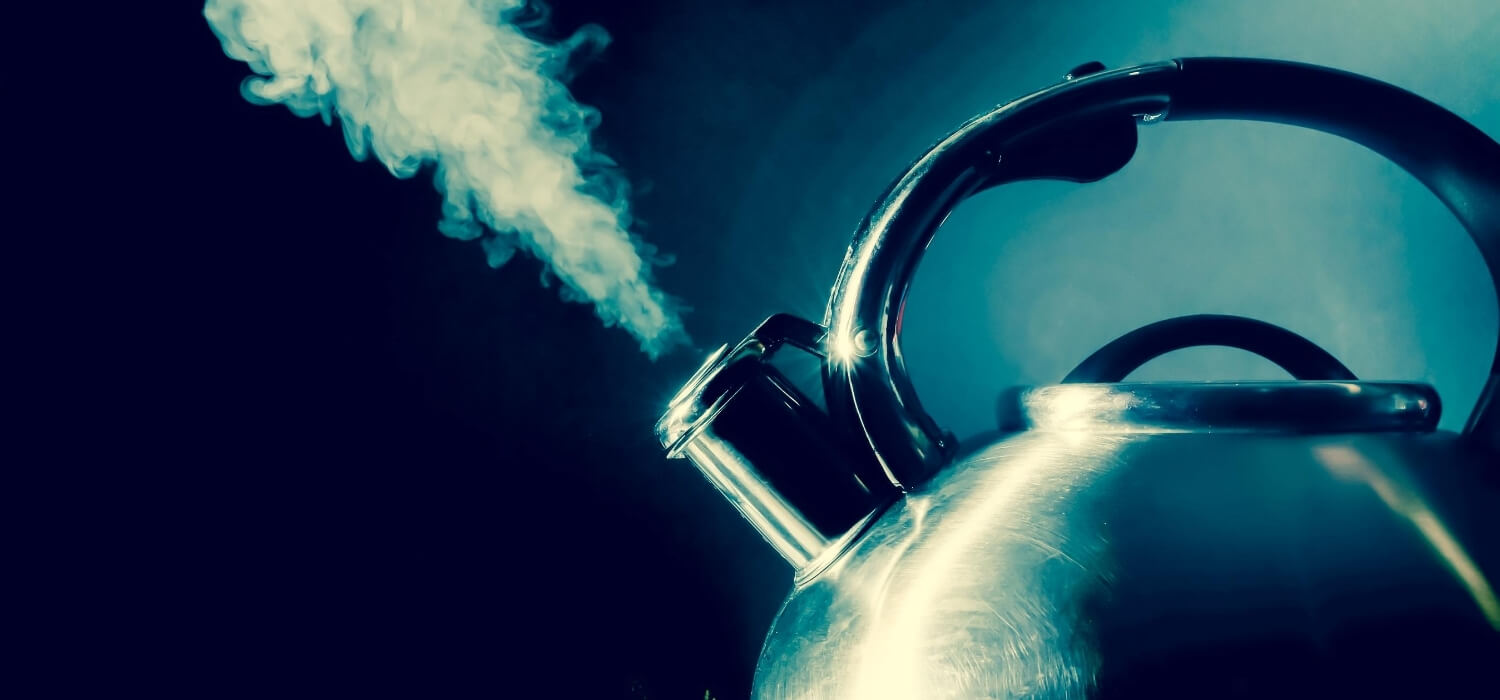
Water heaters come with a device called “temperature and pressure relief (TPR) valve”. This small tool allows steam or water to exit the heater in case the temp or the pressure inside goes up too high, just like a tea kettle. They should open if the temp goes beyond 210 degrees, or if the pressure reaches 150 psi (pounds per square inch).
A TPR valve should not fail, otherwise, the tank may explode due to the extreme temp or pressure.
That said, be sure to perform regular inspections and tests of your TPR valve. This is also for your safety, so it should be part of your water heater preventive maintenance tasks.
You can do this prior to flushing your tank. If you have very hard water, test your TPR valve at least twice a year.
To start, place a bucket below the TPR valve. Unlike the drain valve, the TPR valve is set higher on one side of the tank, or in some heaters, at the top. Look for a lever — that’s the TPR valve.
Connect a pipe (if you don’t have one, your garden hose will do) to the TPR valve. The other end of the pipe or hose should be inside your bucket or placed over a floor drain.
Next, lift or push the lever — you should hear some sort of “rushing air” sound. You may also see some vapor (if the tank is still warm). Water should drip into your bucket or flow out of the pipe or hose and into the floor drain.
If none of these happens, or if the valve is stuck, take this as a cue to call an emergency plumber. Since the valve is stuck, then it won’t be able to let out steam or pressure when it’s supposed to. You need to get it replaced ASAP before excessive pressure builds up in your tank.
Know When to Replace the Anode Rod
The anode rod is a device that “sacrifices” itself to protect the interior lining of your water heater. Its purpose is to draw corrosive elements to itself instead of your tank. Think of it like a magnet, attracting mineral and metal ions that cause oxidation and rust.
Without this sacrificial rod, your tank’s lining will degrade early. However, it’s also this “sacrifice” that makes anode rods last only between three and five years.
That said, never let the anode rod deplete to the point that it can’t attract corrosives anymore. You don’t have to replace it every year, but you should inspect it at least once a year. You can do this during one of the times you’re testing the TP/R valve or flushing the tank.
You’ll find one end of the anode rod attached to the top side of your heater. The rod extends all the way into the water, so they’re about 30 to 50 inches in length. You’d need to unfasten the rod in order to actually verify its condition.
Sometimes, extreme corrosion may already show up on the visible end of the rod. If you see this, and you know you haven’t had the rod replaced in years, it’s time for a replacement.
Prevent Hard Water From Cutting Your Heater’s Life Short
Hard water isn’t a major health and safety threat, but it can shorten your water heater’s service life. It also affects the efficiency and performance of water heaters.
In fact, a study found that water heaters using hard water uses a lot more energy than those that use soft water. Homes with soft water also have lower costs related to the purchase of cleaning products.
Scientists also discovered that prolonged exposure to hard water can damage pipes. The limescale they develop can gradually eat at the pipes’ components. Over time, corroded pipes can leach metals, which can then contaminate your water.
As such, you might want to invest in a water treatment system, such as a softener, to extend your heater’s life. At the same time, you’ll be able to cut back on your water heating and household cleaning costs. This will also help improve the performance of your other water-using appliances.
Follow This Guide on How to Clean an Electric Water Heater Now

There you have it, the only guide you’ll ever need on how to clean an electric water heater. As you can imagine, these water heater maintenance tips do require time and effort. They’re worth it though, seeing as they can help you save energy while also making your heater last longer.
So, as soon as you can, give your hardworking water heater some much-deserved TLC!
If you discover leaks or other problems while cleaning your water heater, know that we can help. Request an appointment with us now and we’ll have a licensed plumber come to your rescue! You can also call us directly if you need emergency plumbing services.