Sudden Low Water Pressure In Your Kitchen Sink: What You Need To Know

Enjoy reading the latest DIY articles and saving money?
Receive our latest helpful hints, tricks and savings, directly to your inbox.
Posted October 10, 2025
It’s finally Saturday, the day you’re hosting a party for family and friends. You go to the kitchen, ready and excited to prepare the snacks and dishes you plan to serve tonight. Then, after completing the mise-en-place of your ingredients, you take them to the sink to wash them up.
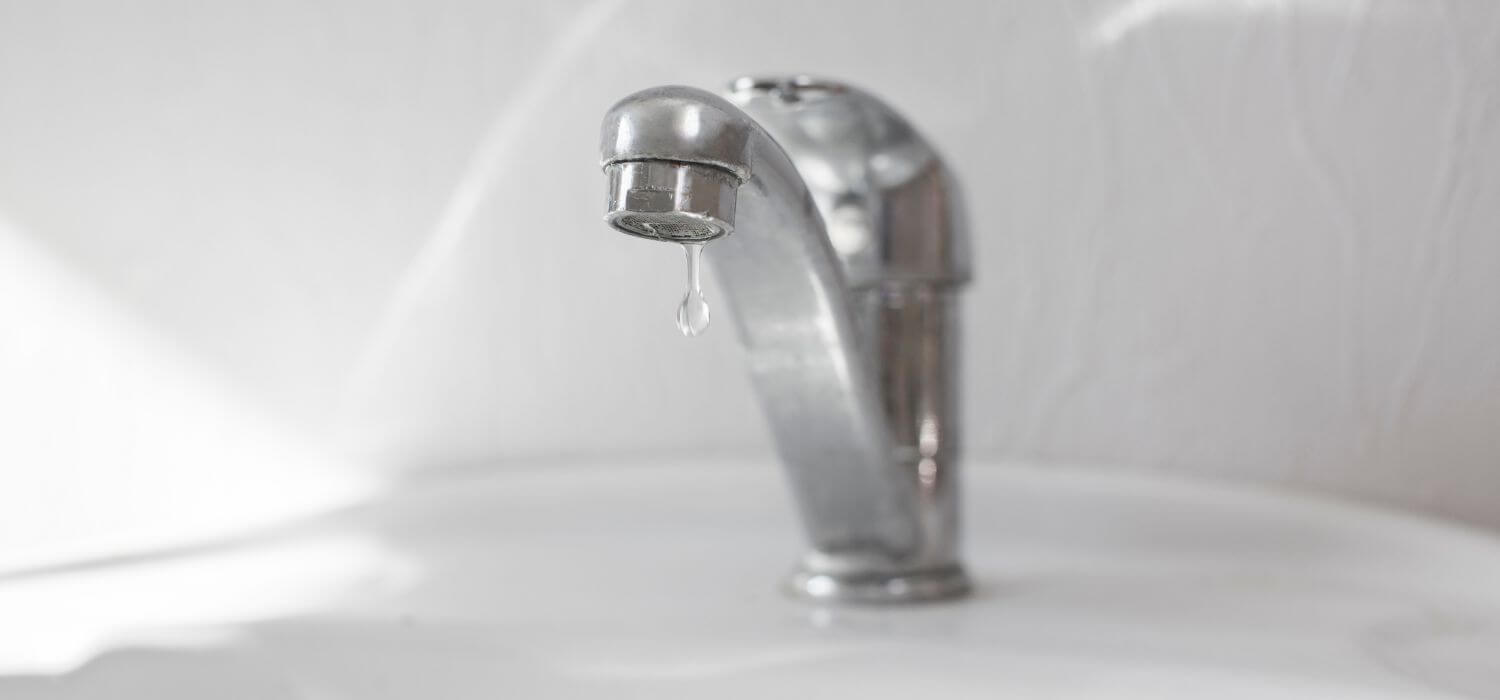
You switch the faucet on, and water comes rushing out. But then, this happens after a few seconds: a sudden low water pressure in your kitchen sink tap. So, you turn it to full blast, but that doesn’t help.
Should you call an emergency plumber, then? Not yet; you can first troubleshoot your plumbing, as some causes of low water pressure are easy to fix. We’ll discuss the top culprits (and their possible fixes), so keep reading.
Dirty or Clogged Aerator
Aerators are circular meshed devices screwed onto faucet spouts. They create a steady stream of water, preventing it from splashing all over the sink and you. They do this by adding air to the water to make it flow more smoothly.
Before you check your kitchen faucet’s aerator, run the other taps in your home first. This can help you determine if the problem only affects your kitchen tap or is a whole-house issue. If it’s an isolated problem, you can check and clean the aerator.
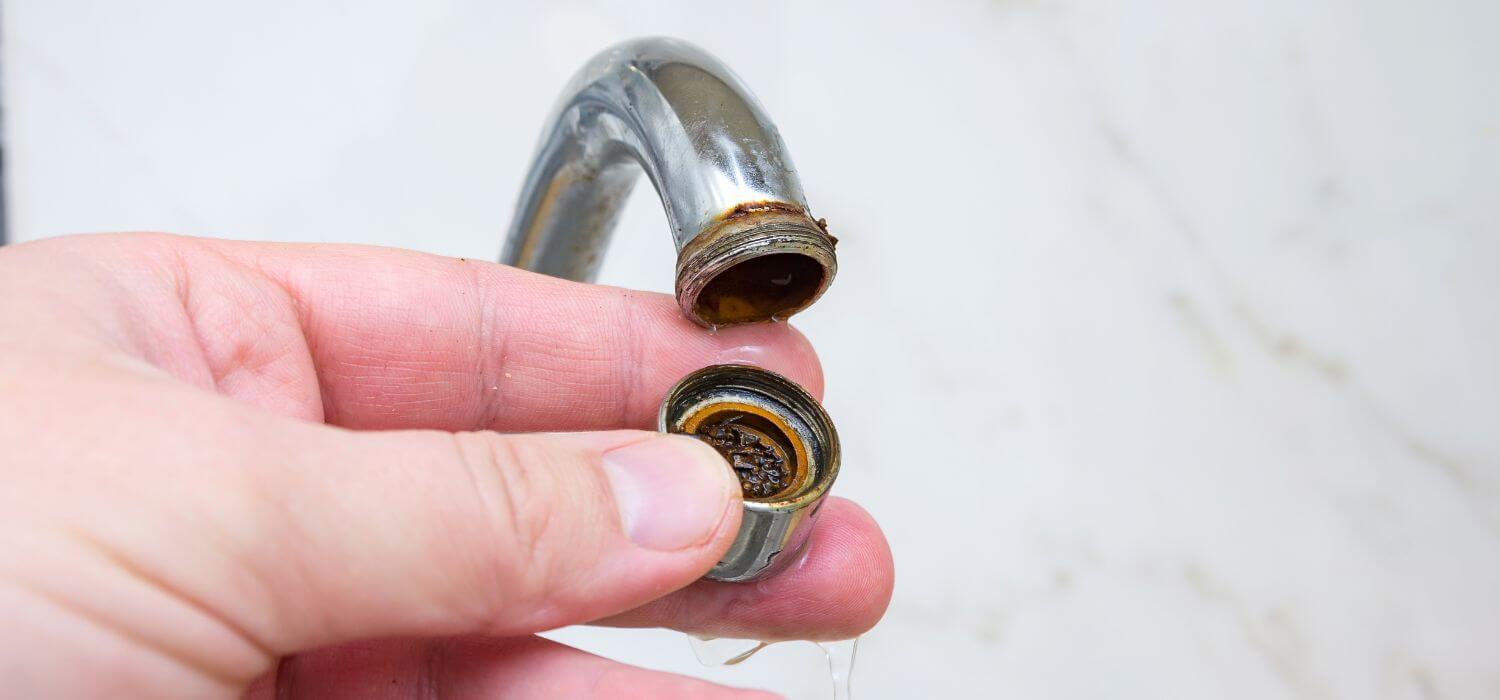
Remove the Aerator
You can unscrew the aerator by hand from your kitchen tap’s spout. Once removed, check it for dirt, molds, or mineral deposits (limescale). You can also raise it against a light bulb; a clog will block the light.
Clean the Aerator
Place the aerator under the kitchen faucet and turn it on to remove loose debris. For more stubborn build-up, you can gently poke it with a toothpick. A soft-bristled brush can also help remove molds and dirt clinging to the mesh.
If there’s still limescale or mold build-up in the aerator, soak it in a bowl of white vinegar. As an acid, it can dissolve calcium carbonate, a component of limestone and limescale. It can also kill some mold species. A 30- to 60-minute soak in vinegar should help clear the build-up in your aerator. You can also use the toothpick or brush again for a more thorough cleaning.
Rinse and Reassemble
Thoroughly rinse the aerator and hold it up against the light again. If light now passes through, you can screw it back onto your kitchen tap’s spout. Run the faucet to confirm that you now have adequate water flow and pressure.
Problems With the Faucet
Suppose the above doesn’t help or the tap has low water pressure even with the aerator removed. In this case, the faucet could be the problem; it may have a clog or leak. Clogs in taps can be due to a build-up of dissolved minerals and other solid particles. This is more likely to happen if you get hard water and don’t use a water softener and descaler.
Faucet leaks can occur when seals, washers, or valves degrade due to age or high water pressure. Conversely, a leak can cause low water pressure as it diverts water elsewhere. These problems are so prevalent in U.S. homes that they waste about a trillion gallons of water yearly.
To fix either problem, you’d have to turn off your main water shut-off valve first. Then, you’d have to remove and disassemble the faucet. This can be tricky, as taps have many tiny parts you must put back together correctly.
Consider calling a plumber to reduce the risk of causing more plumbing problems.
A Clogged Water Line
Another possible cause behind a sudden low water pressure in your kitchen sink tap is a clog in its supply line. This blockage can result from rust or corrosion, mineral deposits, and other debris.
Corrosion is more common in metal water supply pipes, mainly galvanized steel. These were popular in the 1960s and earlier and have a functional lifespan of 20 to 50 years. So, if you have an older home, chances are it uses these pipes, which are likely rusted by now.
If your home isn’t that old, it may have plastic water supply pipes. These can last up to 75 years but can still get clogged by mineral deposits and solid particles.
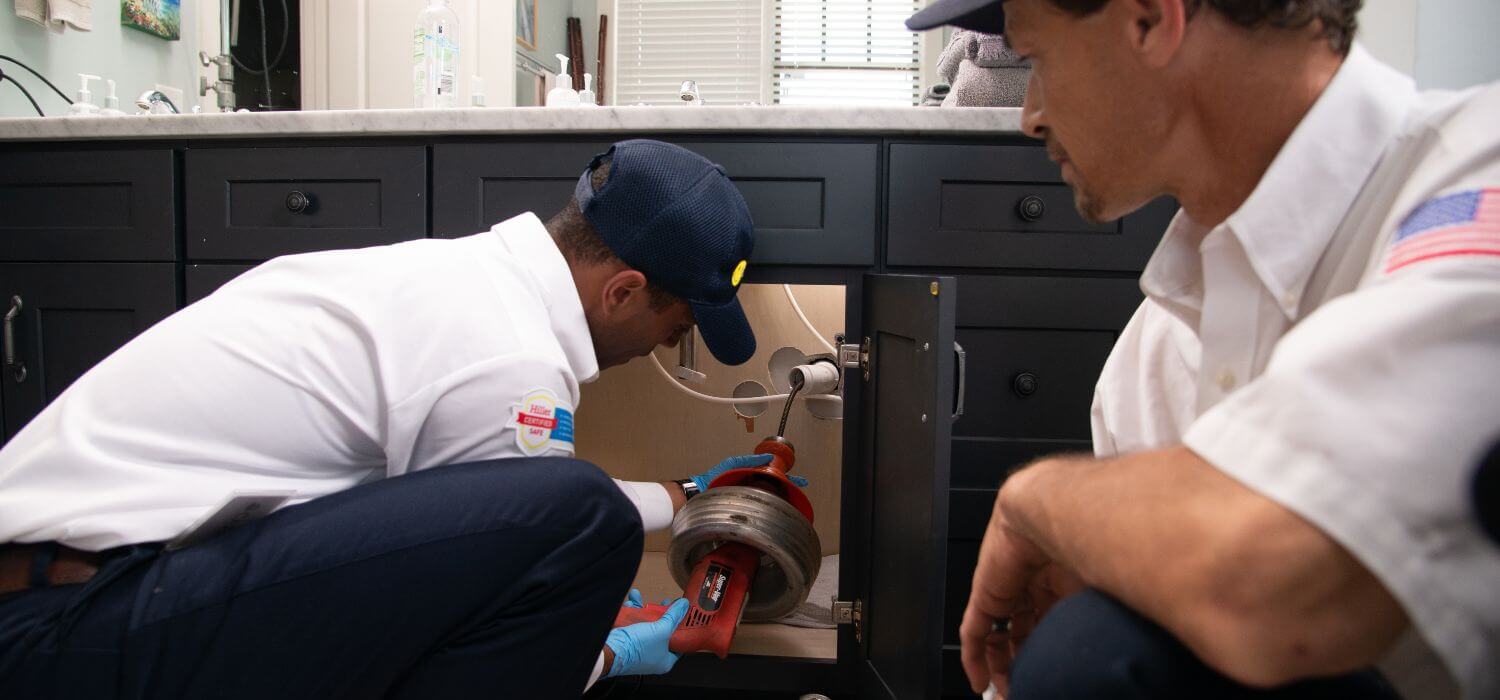
Hiring a highly experienced plumber for this problem is much wiser than a DIY attempt. A good enough reason is that pros use specialized equipment to locate and address pipe clogs. If you were to do it yourself, you’d need the same tools, such as pipe cameras and pressure cleaners.
Depending on the extent of the clogging, your local plumber may use any of the following methods.
Pipe Removal and Cleaning
After locating the clogged pipe, the plumber turns off your main water shut-off valve. They then detach the affected tube and inspect its exterior for any damage, such as a crack. If there’s none, they can clean it from the inside, usually with an air pressure cleaner.
After cleaning the pipe, the plumber thoroughly inspects the interior pipe walls. If they don’t see any damage, they’ll return it and test the water flow and pressure.
Pipe Replacement
If the pipe has severe clogging or corrosion, the plumber will recommend replacing it. An example is if you have a severely rusted galvanized water pipe. In this case, the clog may be primarily due to corrosion particles. Even if the plumber can remove the blockage, the pipe’s walls may be too compromised.
In that case, it may not take long for the pipe to become clogged again. Worse, it can rust through and leak, causing problems more severe than low water pressure.
A Broken Water Line
A break or leak in the water supply line feeding your kitchen tap can result in low water pressure. One way to determine if you have this issue is to check if you have water pooling under the sink. If you see any by the supply tubes, they likely leak.
Another way to confirm plumbing leaks is with a water meter test. First, tell everyone else at home to stop using the water for the next hour or two. This is crucial to ensuring the test’s accuracy. You should also wipe the area under your kitchen sink and place dry rags by the supply lines.
Next, grab a pen and paper or your smartphone and head to your water meter. It should be near the sidewalk or street in front of your home and inside a meter pit or a concrete box with a metal lid. Write down or snap a photo of the numbers on the meter’s display. Then, set your alarm for 60 minutes or, better yet, 120 minutes if you have time and can wait.
Once your alarm goes off, recheck the water meter. The odds are high that you have a plumbing leak if the numbers have changed. And, if the towels you placed under the sink are damp after the test, it indicates you have leaky supply lines.
It would be best to call a plumber ASAP to fix the leak. Otherwise, it’ll keep wasting water, which you must then dry off immediately. If you don’t, it can cause water damage and promote mold growth, which has potential health risks.
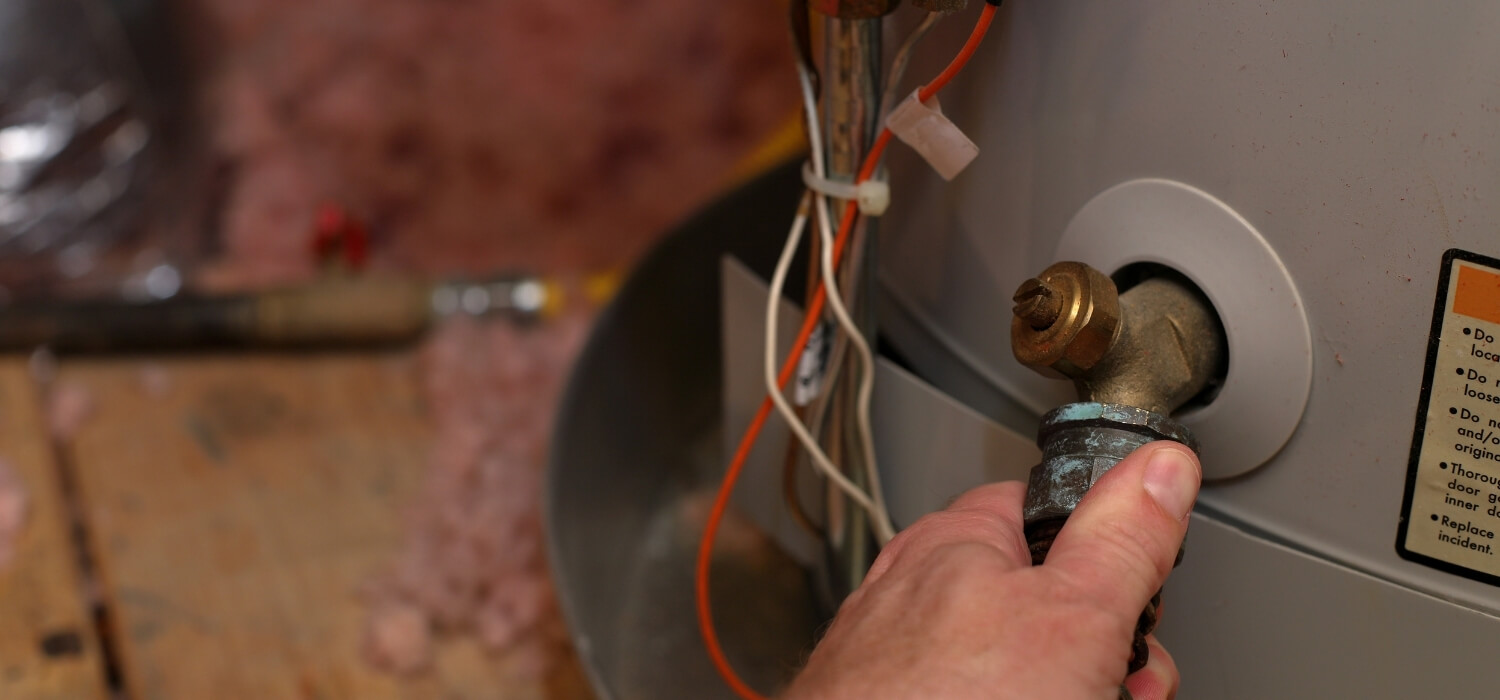
Water Heater Problems
Suppose you performed a whole-house test and learned that your cold water taps are fine. The low-pressure problem just seems to be affecting your hot water taps. In this case, your water heater is likely experiencing one or more of the following issues.
Particle and Sediment Build-Up
Like aerators and pipes, water heaters can also accumulate particles and sediments. This is why you must regularly perform a water heater flush, whether you have a tank or tankless system. If not drained and flushed yearly, clogs can form inside the heater and reduce water pressure.
Particle and sediment build-up can also lead to poor water heater efficiency. In this case, the system takes longer and uses more energy to heat the water. As a result, you may see a spike in your water heating bills.

Get your tank or tankless water heater serviced if you experience any of the symptoms above. Please do this ASAP, as extensive build-up can cause your system to fail and break down completely.
Leaks in the Water Heater
Tank and tankless water heaters can spring leaks that may then result in low water pressure. In a traditional system, leaks can affect the tank, pipes, joints, and valves. As for a tankless system, these problems can occur in and around the lines and connections.
Since water heater connections are accessible, it’s easier to spot leaks affecting them. You just need a flashlight (if the heater is in a dim room) and some dry rags to perform a leak test. Wear protective gear, too, including thick rubber gloves and goggles.
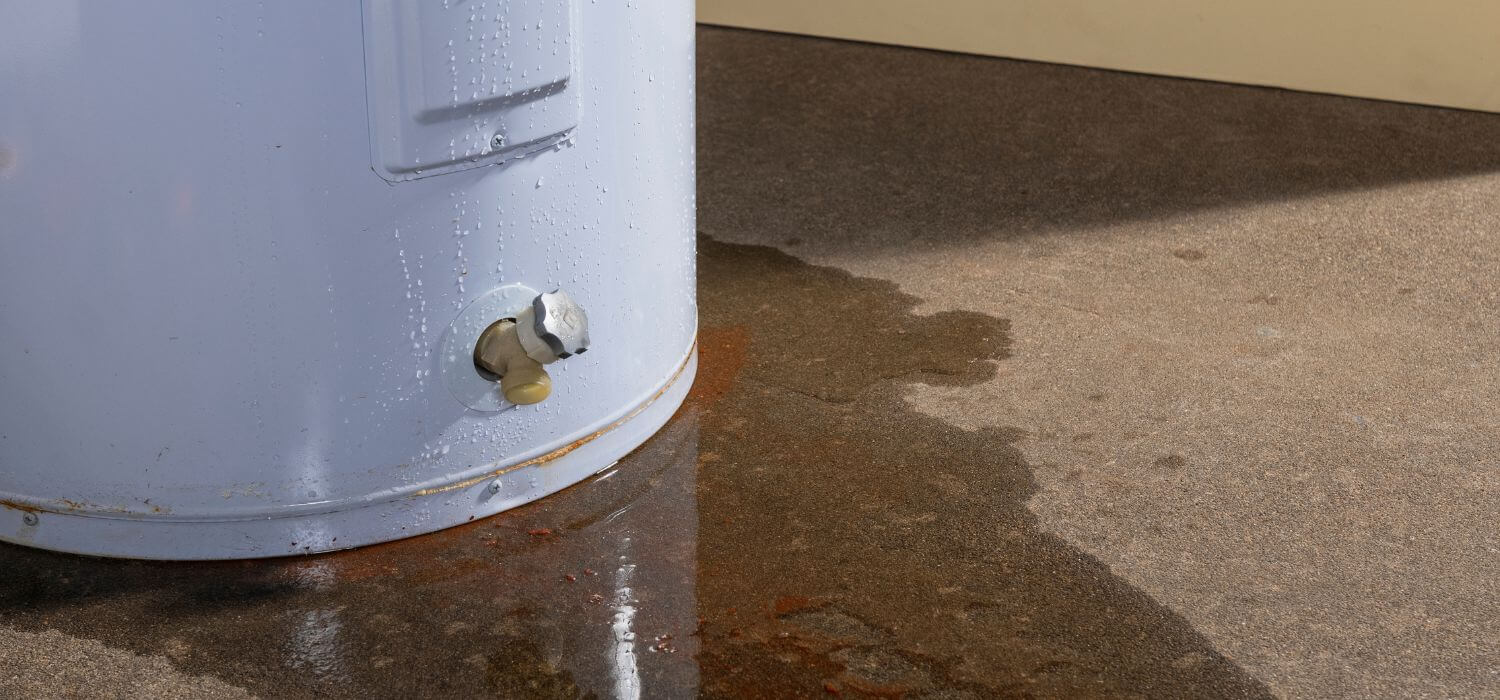
Go to your water heater and turn it off to avoid injuring yourself from hot water and pipes. Then, shine the flashlight on the area directly below it. If there’s water pooling under, dry it off immediately with the rags.
Next, wipe the heater and inspect it for any signs of drippage. If there are visible water droplets, use a dry rag to wipe them off and wait to see if new ones will form. If they do, the connection or tank likely leaks from there.
If it’s a leaking connection, try tightening it with a wrench. If that doesn’t help or you think it’s a tank leak, it’s best to call a professional plumber.
Faulty Water Pressure Regulator
A water pressure regulator is a valve specifically designed to reduce water pressure. It also goes by the name “pressure-reducing valve” (PRV).
PRVs can fail due to age, wear, and tear. When this happens, they can restrict the water pressure further or not reduce it all. So, if low water pressure affects multiple fixtures, not just the kitchen tap, you may have a faulty PRV.
Locate the PRV and Pressure Gauges
The PRV should be outside, just past your main water shut-off valve. It’s a bell- or dome-shaped brass fitting with an adjustment screw at the top. Next, check if you have a pressure gauge installed before, after, or on both sides of the valve. The gauge closest to your home should say 50 PSI or less. If it doesn’t, and you have low water pressure, it’s a sign of a valve defect.
If there’s no gauge, get one from the nearest home improvement or hardware store. You also need a crescent wrench to adjust the regulator.
Install the Pressure Gauge
Connect the gauge to the outdoor hose spigot closest to your main water supply line. Ensure the connection is secure by turning on the faucet and checking for leaking water. If there’s none, open the faucet as far as it can go and monitor the gauge’s dial. If it’s under 40 PSI, you can slightly adjust the PRV to increase water pressure.
Adjust the PRV
Slowly loosen the lock nut securing the valve’s bolt or screw with your crescent wrench. Then, turn the bolt or screw clockwise by one revolution. Perform the pressure test again to see if the gauge now reads 40 to 50 PSI.
If it does, test your kitchen sink tap. If the water pressure and output have improved, you did an excellent job. If the problem persists, it’s time to ring up your local plumber to check (and likely repair or replace) the PRV.
Need Help With Sudden Low Water Pressure in Your Kitchen Sink?
Did the DIY tips above fail to fix the sudden low water pressure in your kitchen sink? Contact us to schedule your plumbing maintenance or repair appointment. You can expect the Hiller team to provide you only with the high-quality services you deserve.